
Here in this article, we will show you guys how to fix the WiFi option not showing problem in your Windows 11 PC or Laptop. Follow the below steps one by one.
Run Network Troubleshooter:
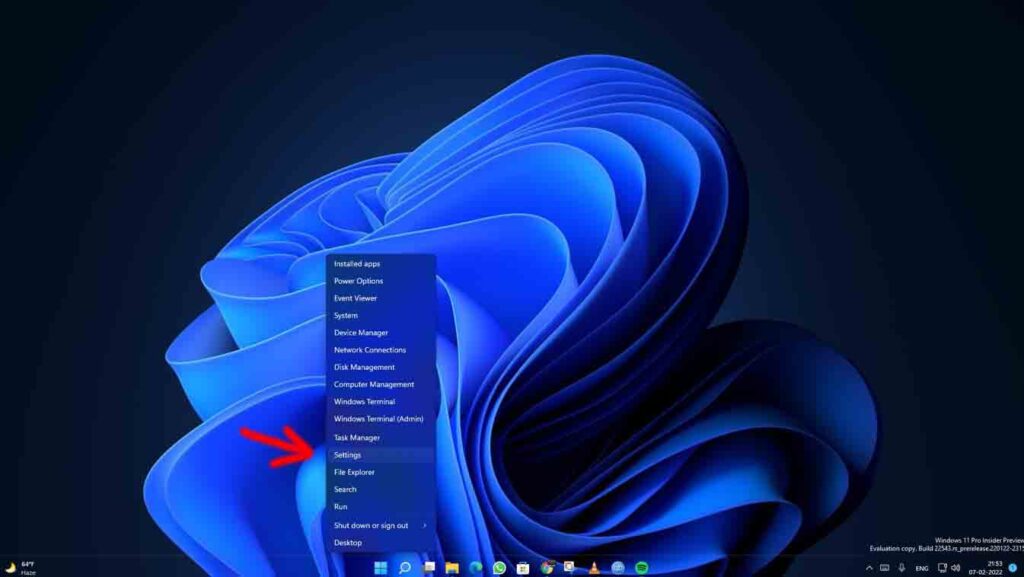
Right-click on the Start Menu icon click on the Settings
Click on System and then Troubleshoot
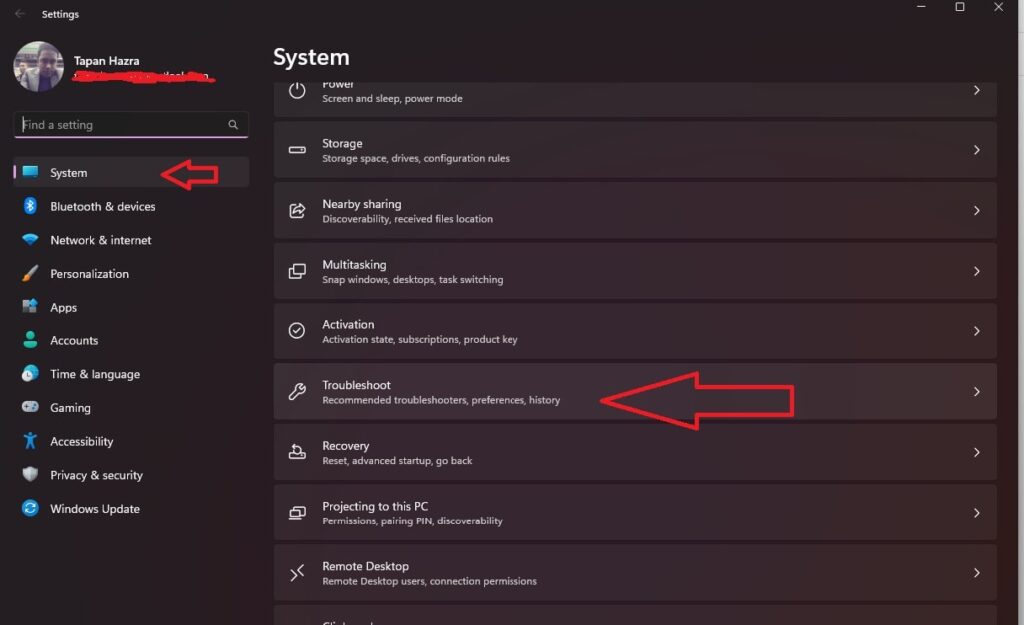
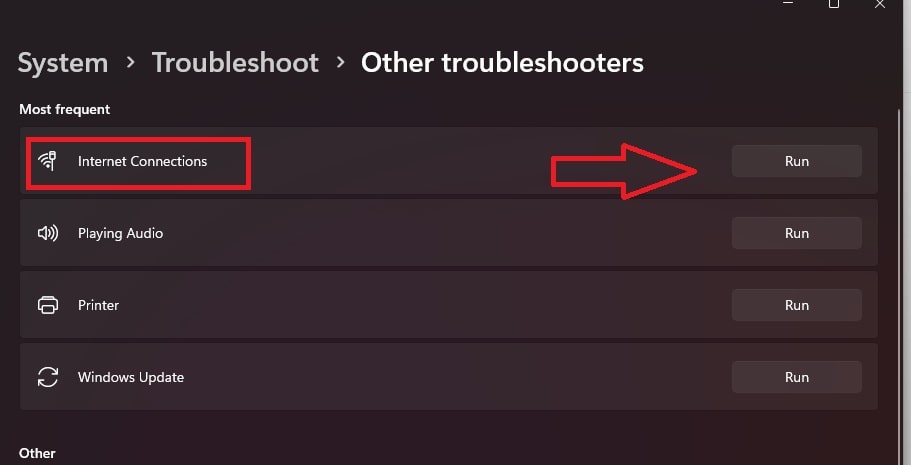
Now Click on Other Troubleshooters

Click on the Run option for Internet Connection
Network Reset:
Right-click on the Start Menu icon click on the Settings
Click on Network & Internet
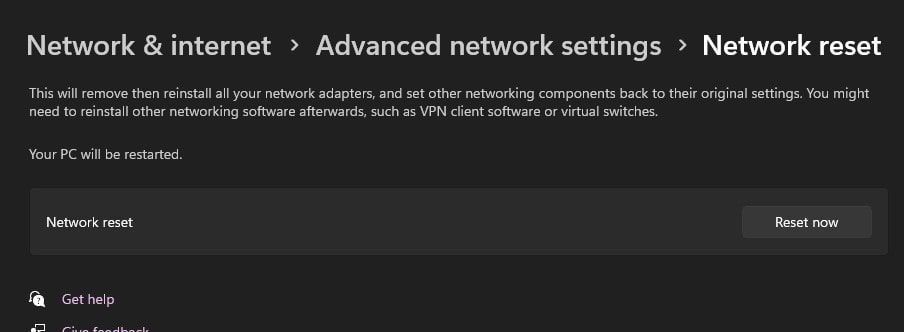
Click on Advanced Network Settings
Click On Network Reset
Now Click on Reset Now
Update Using Device Manager:
Right-click on the Start Menu icon click on the Device Manager
Expand Network Adapters
Right-click on Network Driver and Click on Update
Now Click on Search Automatically for Drivers


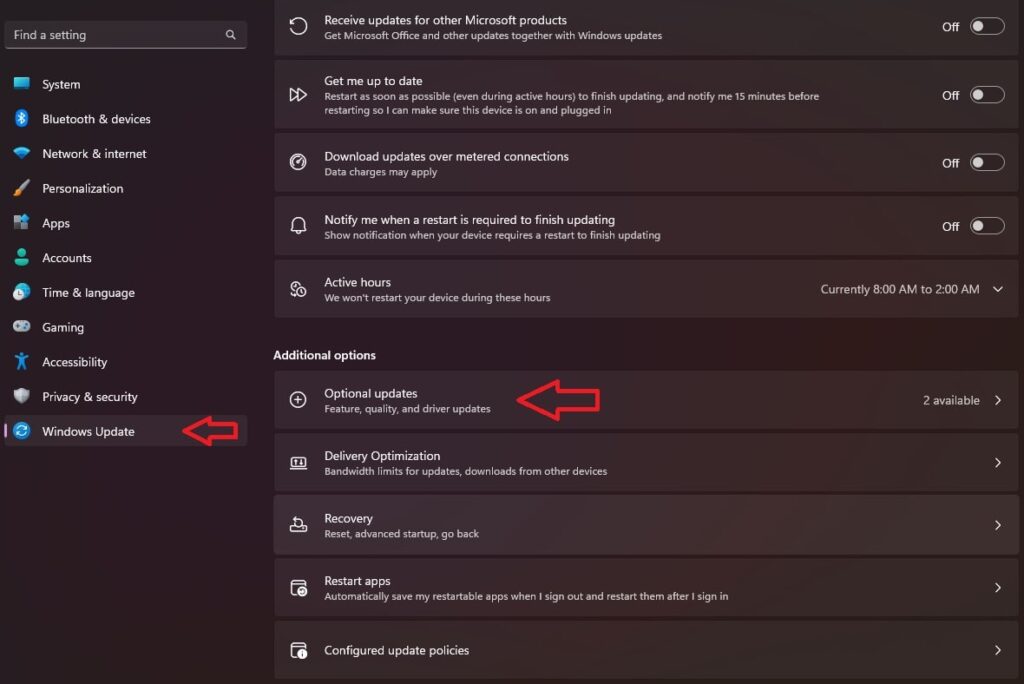
Check Windows Optional Update:
Right-click on the Start Menu icon click on the Settings
Click on Windows Update
Click on the Advanced Options
Click on Option Updates
Now check if any Network Driver Update is available or not. If it’s then download and install the update.
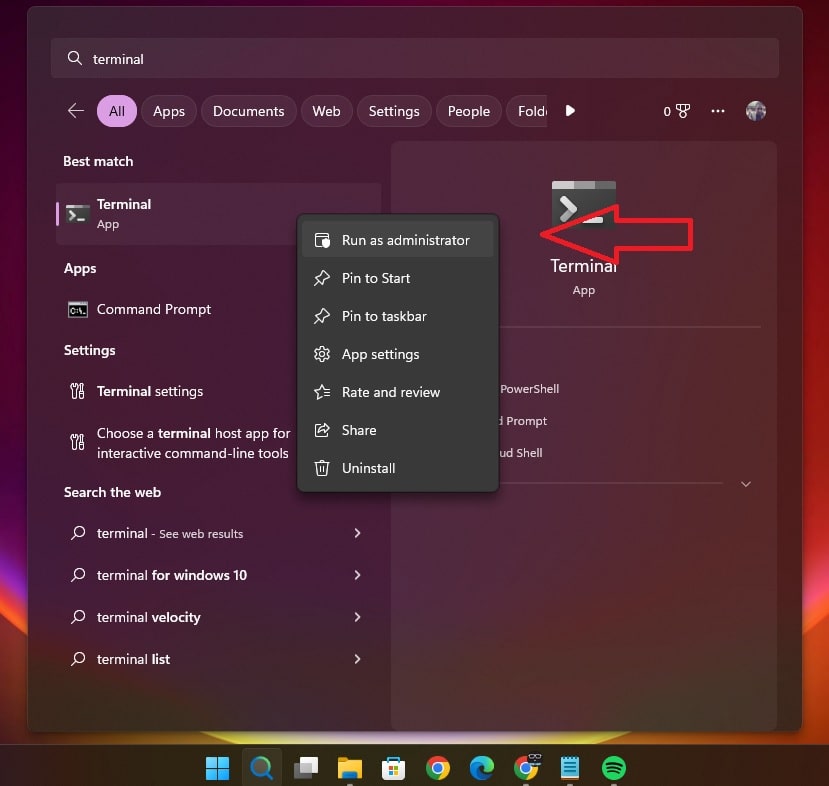
Reset Network Using Terminal Command:
Goto Windows Search or Start Menu
Type Windows Terminal
Right Click on Windows Terminal
Click on Run As Administrator
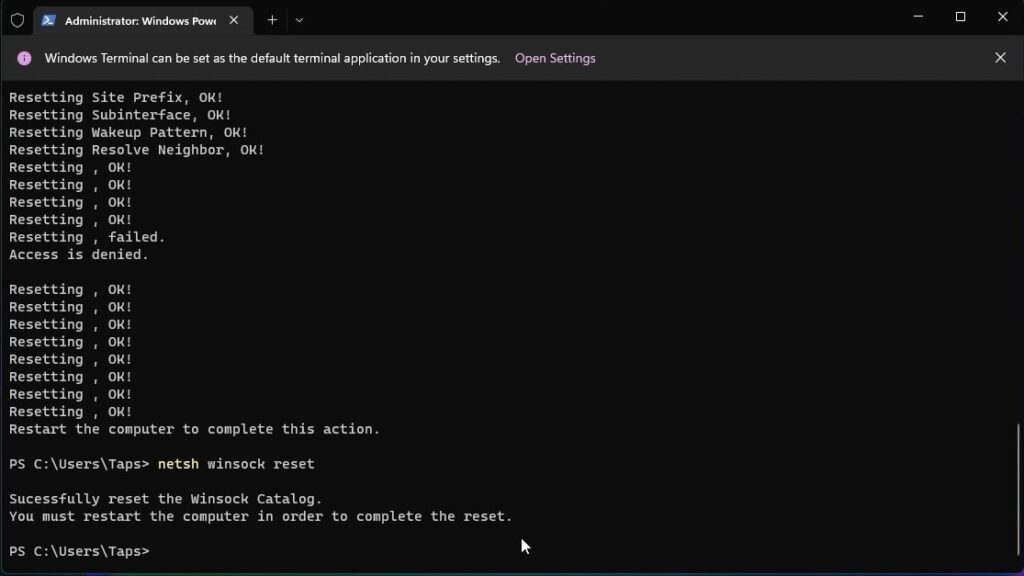
Now Type Below Commands:
Terminal Commands:
ipconfig /release
ipconfig /flushdns
ipconfig /renew
netsh int ip reset
netsh winsock reset

