
Enable or Disable Cortana in Windows 11
Cortana is a virtual assistant of Microsoft, Can help one perform tasks. It can help you to schedule a meeting, set a reminder, search anything on the internet, find answers to questions, locate an item on your computer or phone, and many more of that using your voice. Actually, it saves your time and manages your focus. It was launched by Microsoft in the year of 2015 for personal and business productivity as a competitor of Siri and Alexa. Cortana has a good understanding and completing of context, anyone can use it as voice assistance or type searches there. It helps you access information and connects you with other people faster, mainly personal information is not shared with third-party.
Microsoft has already brought many more Changes in window’s latest version 11. same way changes were made in Cortana’s accessibility. Actually, it was by default activated in windows 10 but in windows 11 it is not activated by default, but anyone can enable it, later on, can disable it by performing a few steps…
For Enable Cortana follow the below steps:
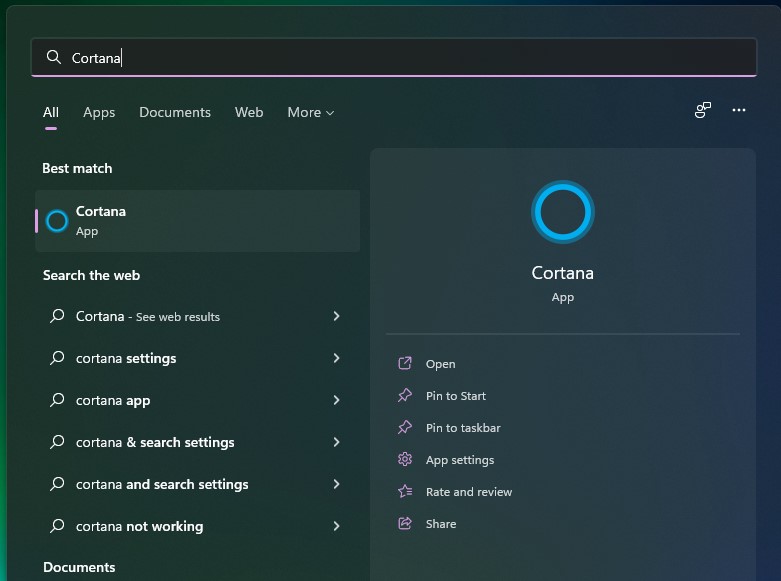
Firstly open the search menu, type “Cortana” and Click on that,
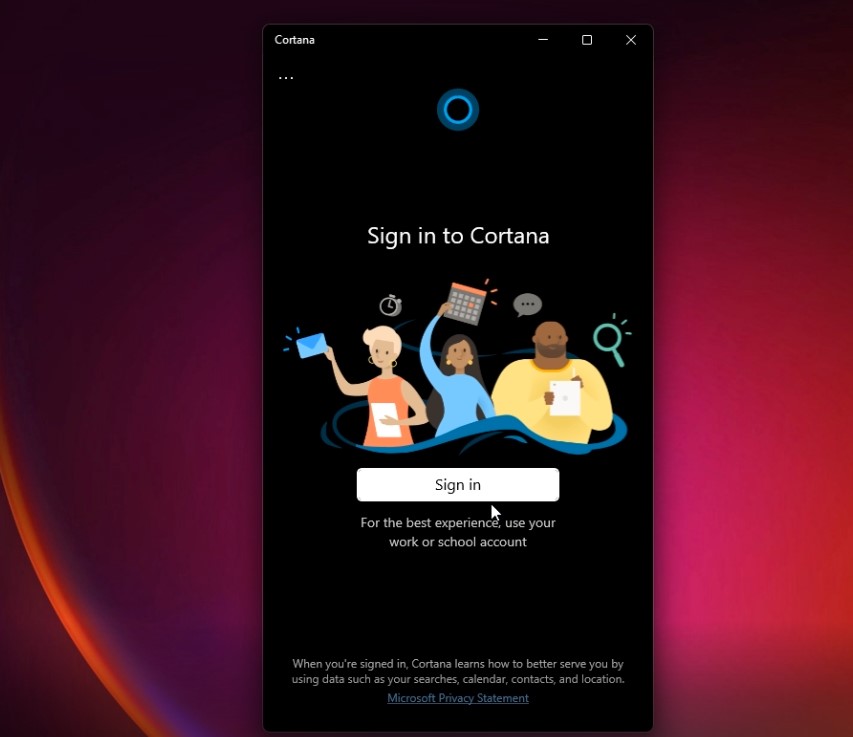
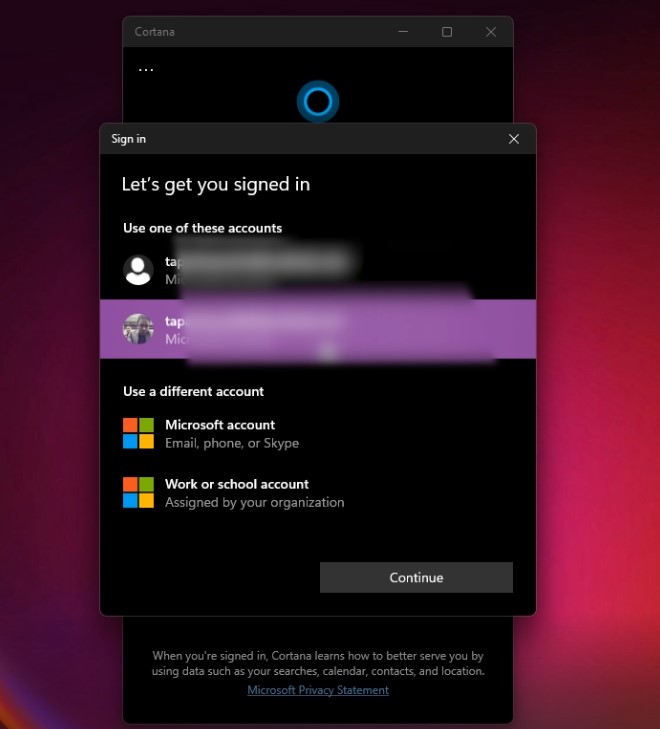
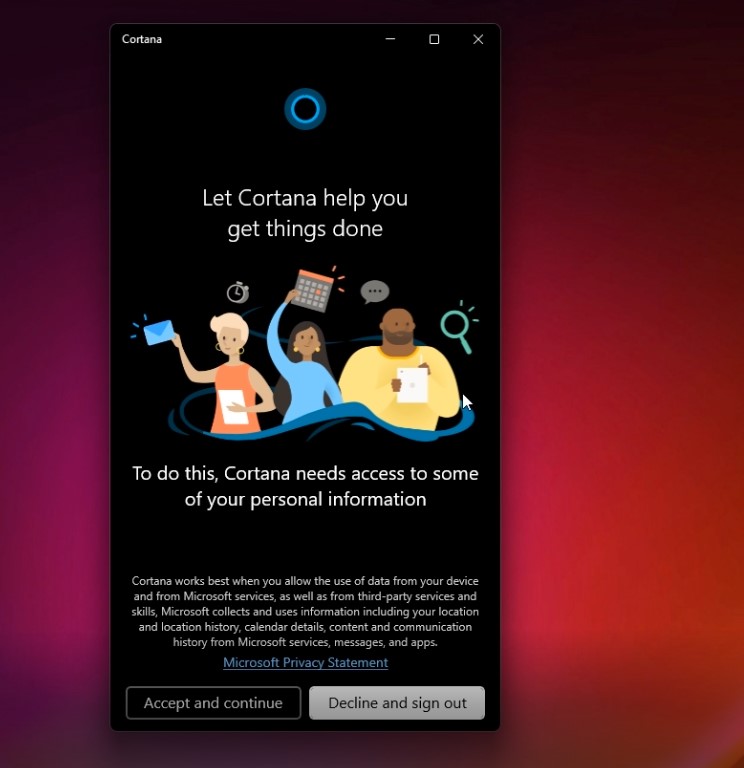
Then click on Sign in and put Email-Id, password and click on “Accept and Continue“.
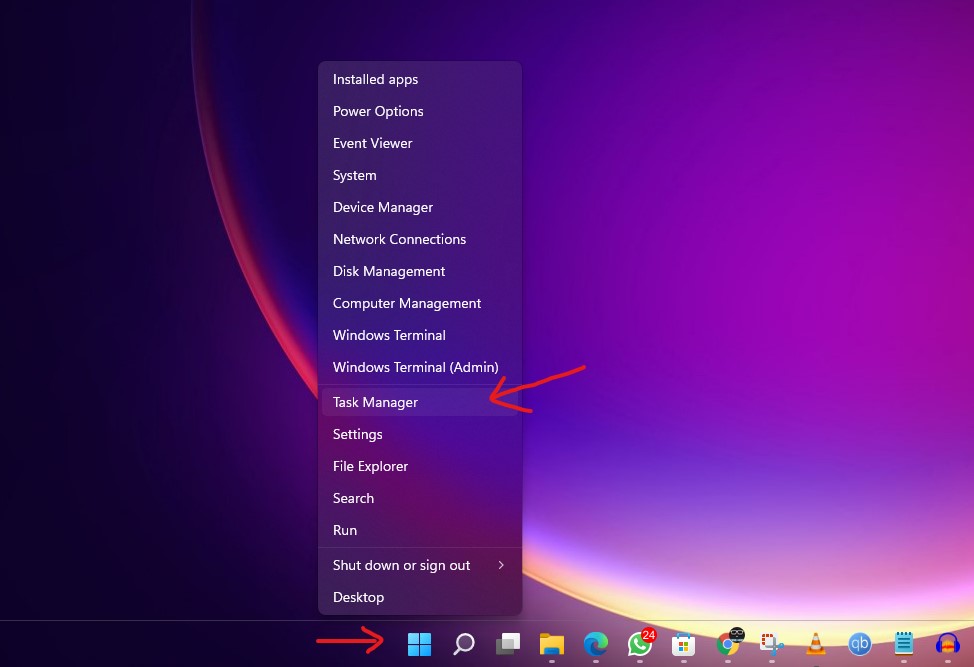
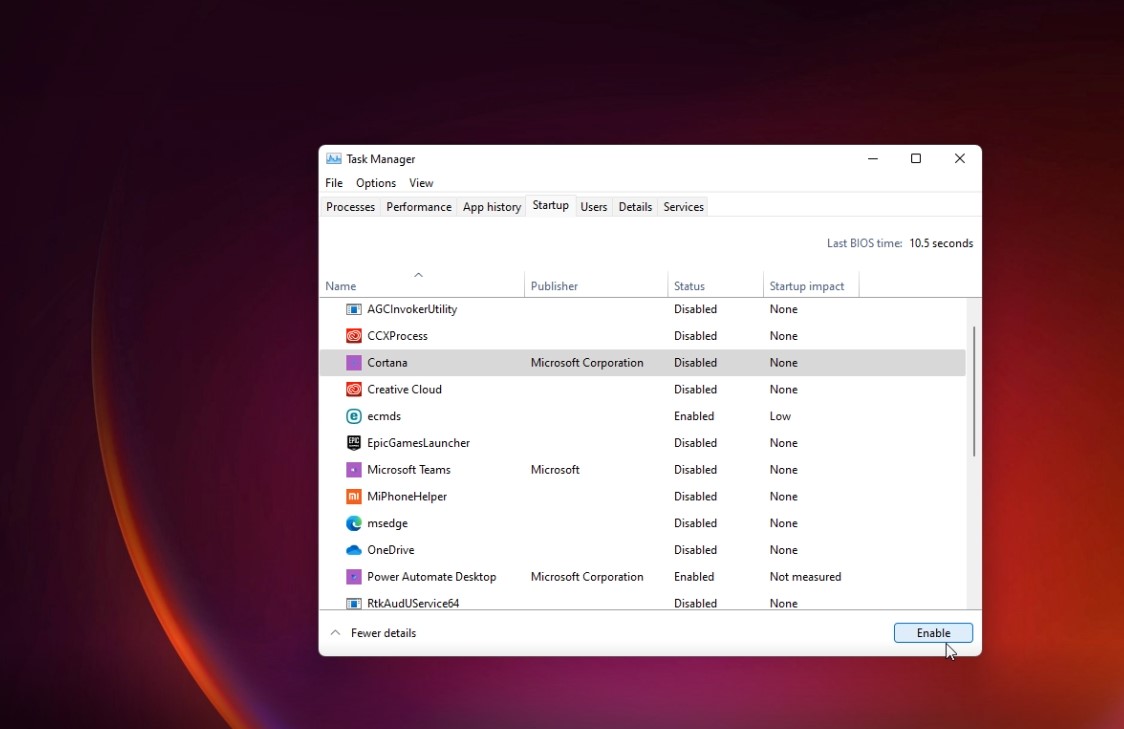
After done right Click on Start Menu and click on Task Manager, Then under startup, select Cortana app and do enable it.
For Disable Cortana follow the below steps…
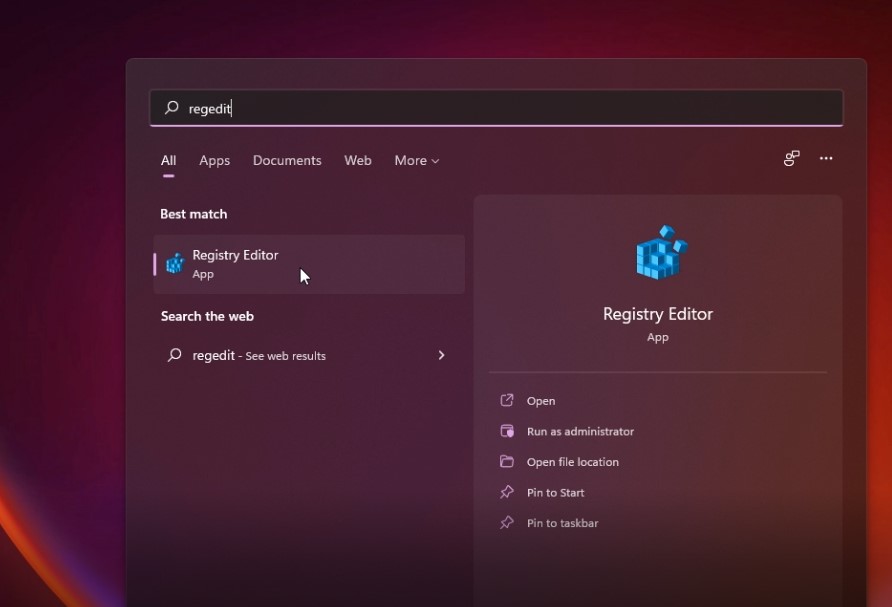
Open Start menu or Search Menu and type “Regedit” or “Register editer“, and Click on it or Enter.

Now copy and paste the below address into the address bar and press Enter.
Computer\HKEY_LOCAL_MACHINE\SOFTWARE\Policies\Microsoft\Windows
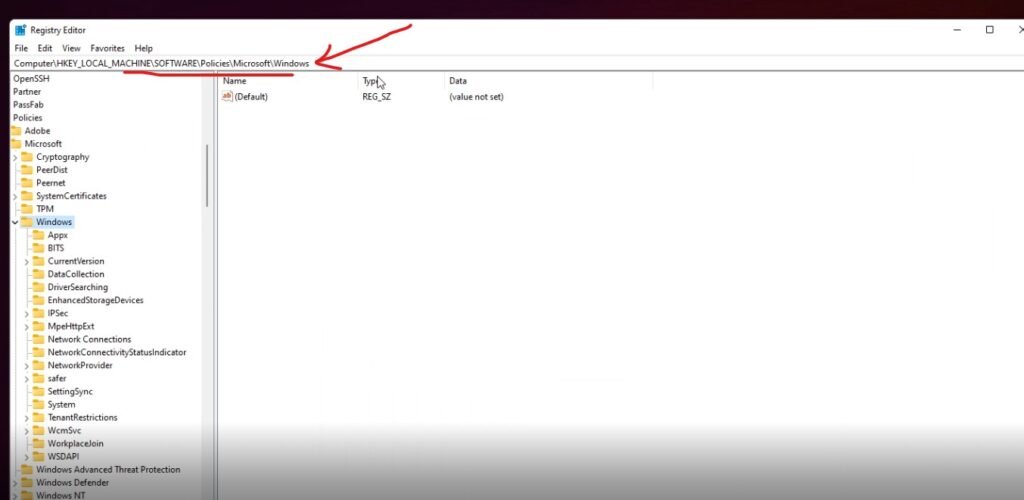
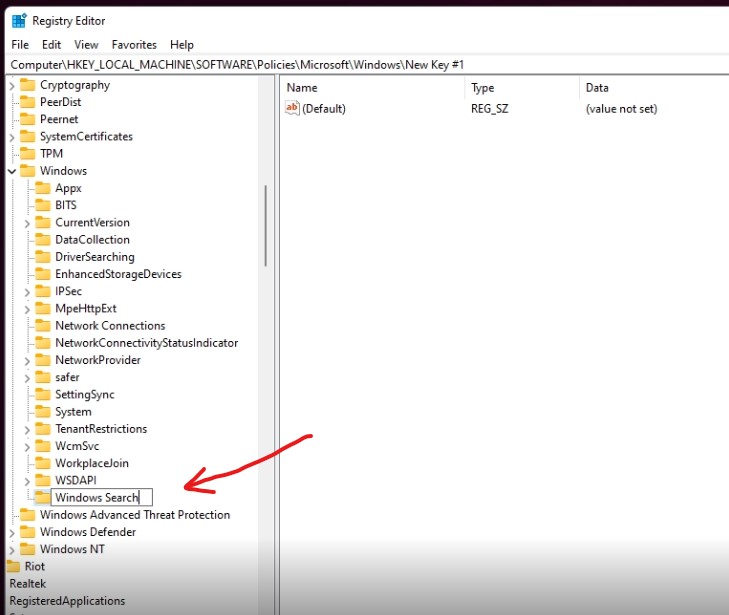
Right Click on the Windows folder to open a drop-down menu, pick new then select key and put a new key name.

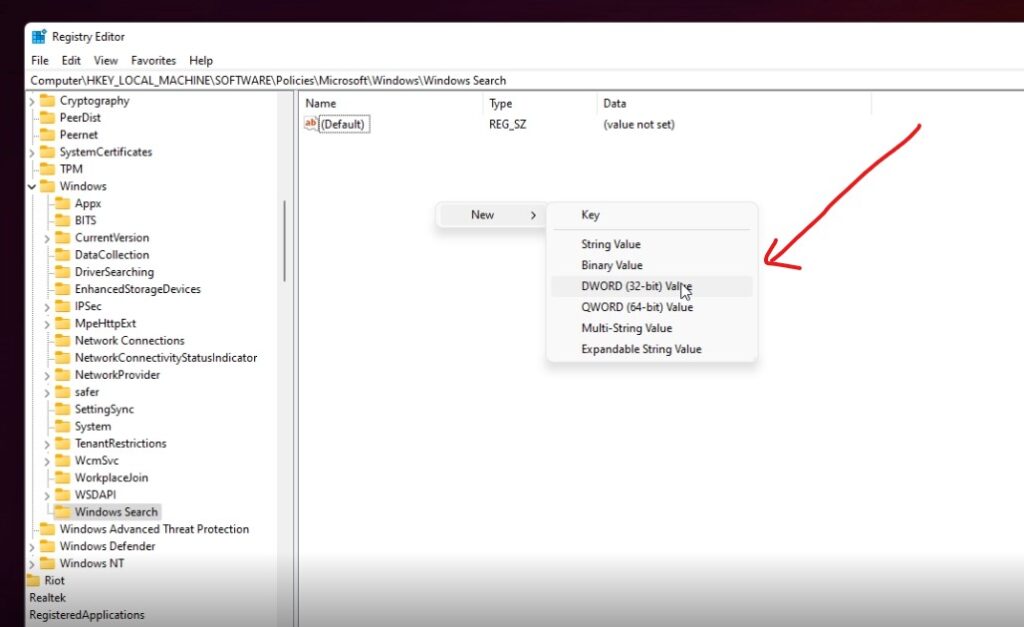
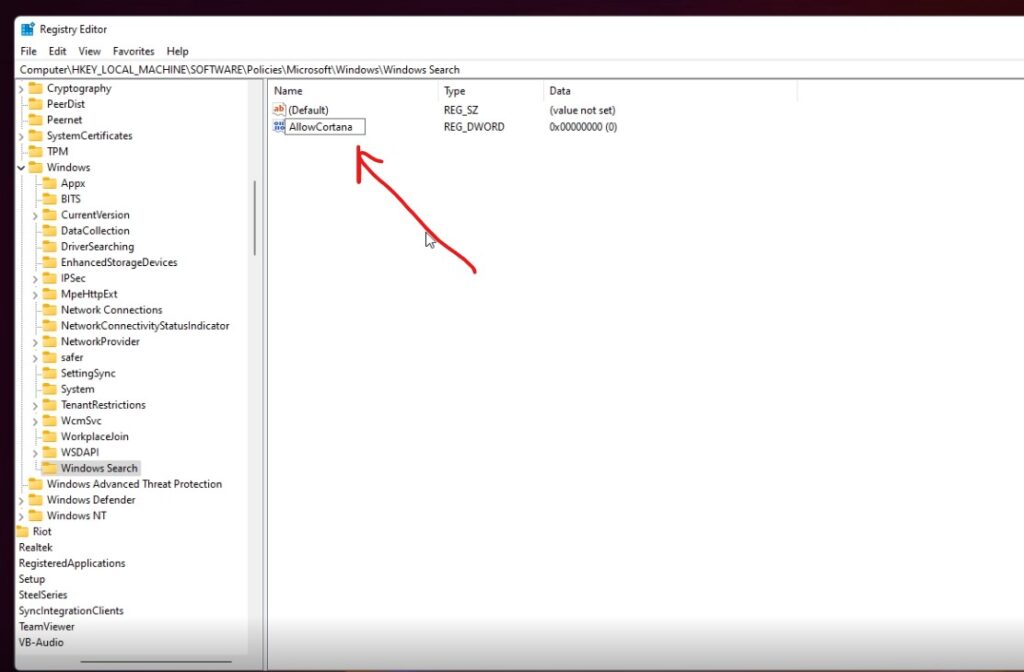
Under that do Right Click from your right side then on new and on “DWORD 32” value and here change the name to “allowcortana“(without giving space).
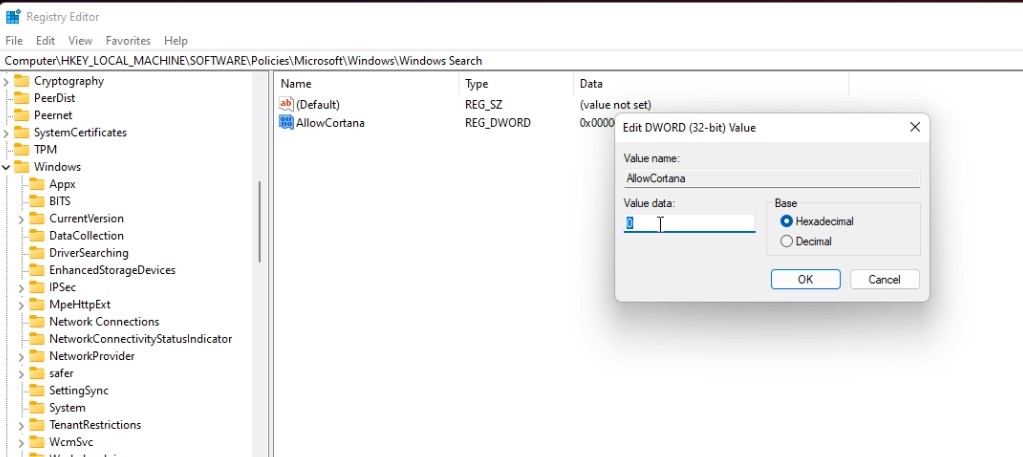
After done this change the DWORD value to “0” to disable it or else change it to”1” to enable.
Then go to startup under Task Manager and Select “Cortana” and click on Disable,
now it will disable Cortana on your windows 11 computer.
I have shared my video here on this tutorial, you can also watch it…


