
Are you curious about the performance of your Windows 11 computer? Perhaps you have noticed some lag or are experiencing slower-than-usual load times. Whatever the case may be, it is always good to have a solid understanding of how your system is functioning. Luckily, with the help of PowerShell, you can run a benchmark test to measure the speed and efficiency of your computer’s CPU, RAM, and GPU.
PowerShell is a command-line tool that can be used to automate tasks and manage system settings on Windows computers. In addition to these functions, PowerShell can also perform various performance monitoring and analysis tasks. One of the most useful tasks is running a benchmark test, which can help identify any performance issues or bottlenecks in your system.
In this article, we’ll take you through the steps of using PowerShell to run a benchmark test on your Windows 11 computer. We’ll cover how to open PowerShell, run the benchmark test script, and interpret the results. By the end of this article, you’ll have the knowledge and tools you need to run a comprehensive benchmark test on your computer.
Step 1: Open PowerShell
To start, you’ll need to open PowerShell. You can do this by typing “PowerShell” into the Windows search bar and selecting “Windows PowerShell” from the search results. Alternatively, you can press the Windows key + X and select “Windows PowerShell” from the menu that appears.
Step 2: Run the Benchmark Test Script
Once you have PowerShell open, you’ll need to run the benchmark test script. To do this, copy and paste the following command into PowerShell and press enter:
Get-WmiObject -class Win32_WinSAT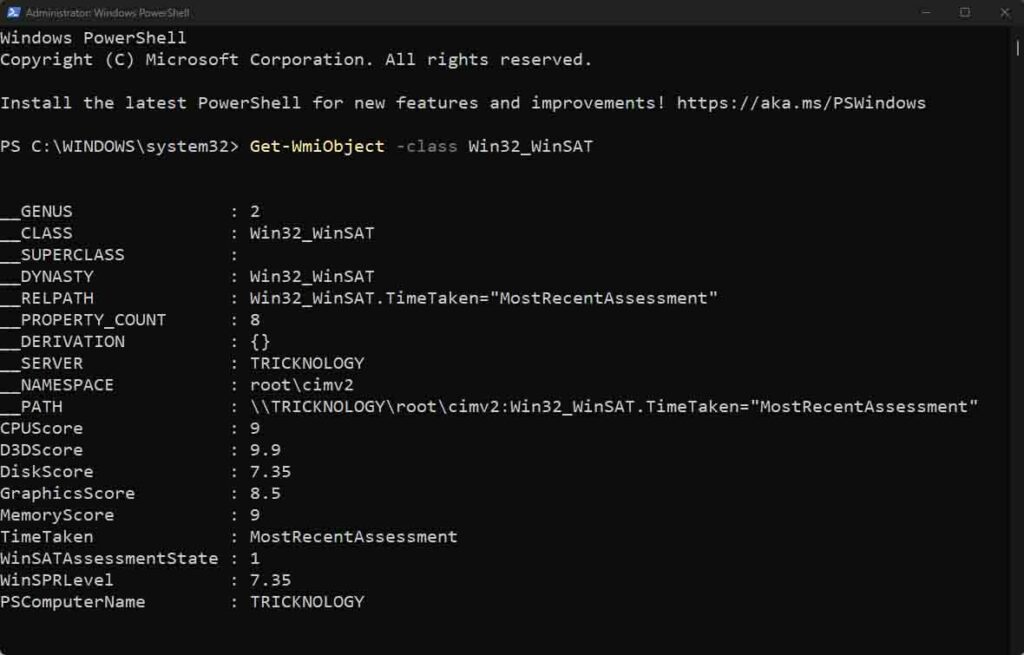
This command will run the benchmark test script, which will test your computer’s CPU, RAM, and GPU.
Step 3: Interpret the Results
After running the benchmark test script, you’ll see a series of results displayed in PowerShell. These results will show you the speed and efficiency of your CPU, RAM, and GPU, as well as other performance metrics.
To interpret the results, look for any areas where your system may be underperforming. For example, if your CPU score is significantly lower than expected, this could indicate a bottleneck or issue with your CPU. You can use this information to make improvements to your system and optimize its performance.
In conclusion, running a benchmark test on your Windows 11 computer using PowerShell is an easy and effective way to measure the speed and efficiency of your system. By following the steps outlined in this article, you can gain valuable insights into your computer’s performance and identify any areas for improvement. So, sit back, relax, and get ready to dive into the world of computer performance testing!
