
Here in this article, I will show you guys how you can download and install Kali Linux on Windows 11 PC or Laptop using the Windows subsystem for Linux. Also, we will show you guys how you can connect that kali Linux machine using a remote desktop. So follow the below article step by step.
⦁ Enable the Windows Subsystem for Linux
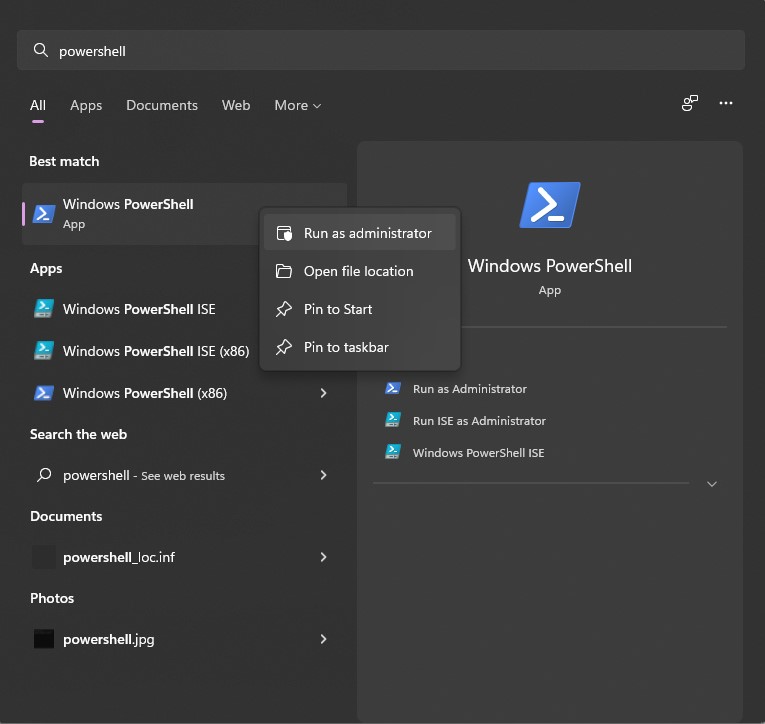
At first, enable the Windows subsystem for Linux. Just Goto Start Menu > type PowerShell > Right-click on Windows PowerShell and CLick on Run as Administrator
Now enter the below command on PowerShell and Press Enter :
dism.exe /online /enable-feature /featurename:Microsoft-Windows-Subsystem-Linux /all /norestart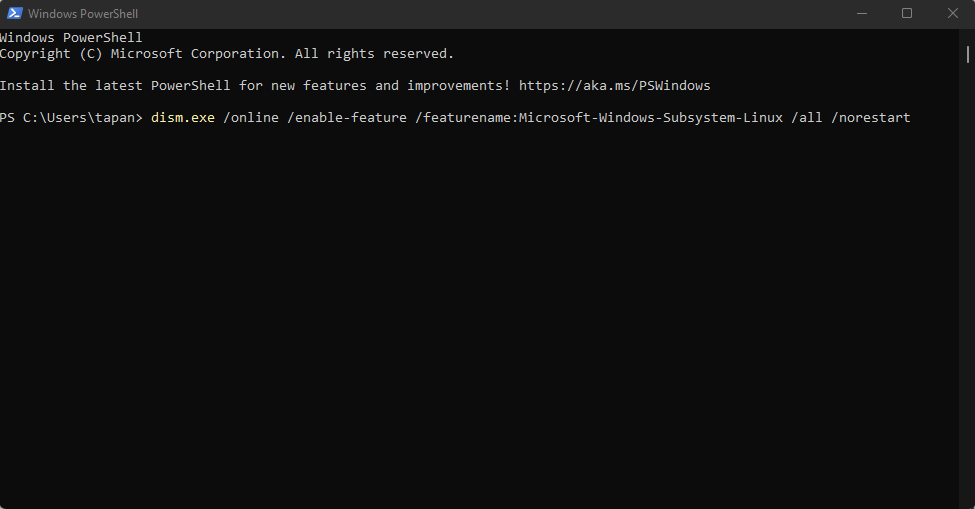
Enable Virtual Machine feature:
You have enabled the virtual machine platform optional feature before installing WSL2.
Open PowerShell as Administrator and type the below command and Enter :
dism.exe /online /enable-feature /featurename:VirtualMachinePlatform /all /norestartDownload and install Kali Linux:
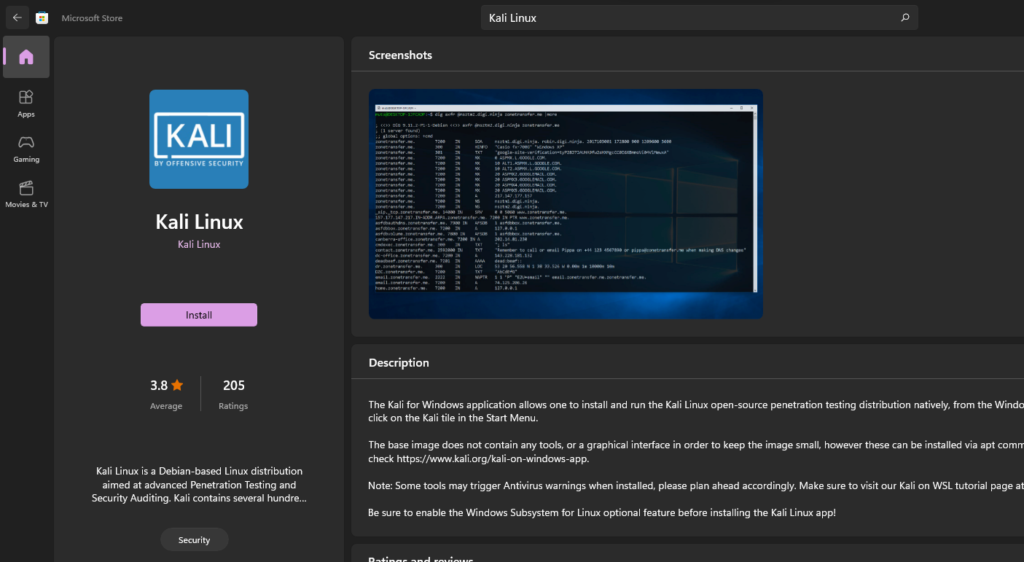
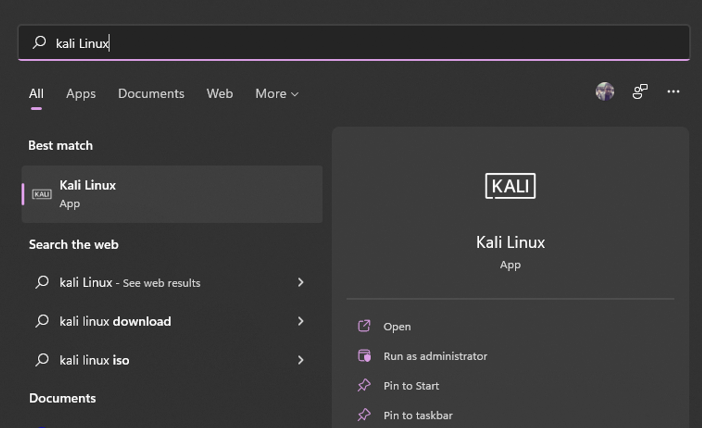
Open Microsoft Store > Search Kali Linux > Download and Install
Now restart your PC or Laptop.
Update WSL(Windows Subsystem for Linux)
Type below command:
wsl --update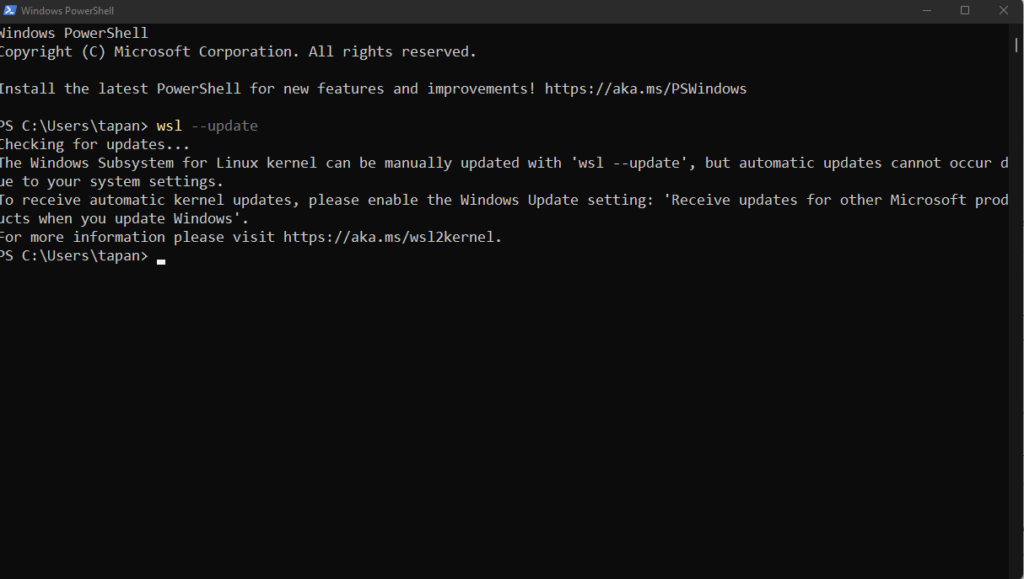
Download WSL2 Linux Kernel Package
Download and install WSL2 Linux Kernel Package For x64 machines from the below link.
Open Kali Linux App:
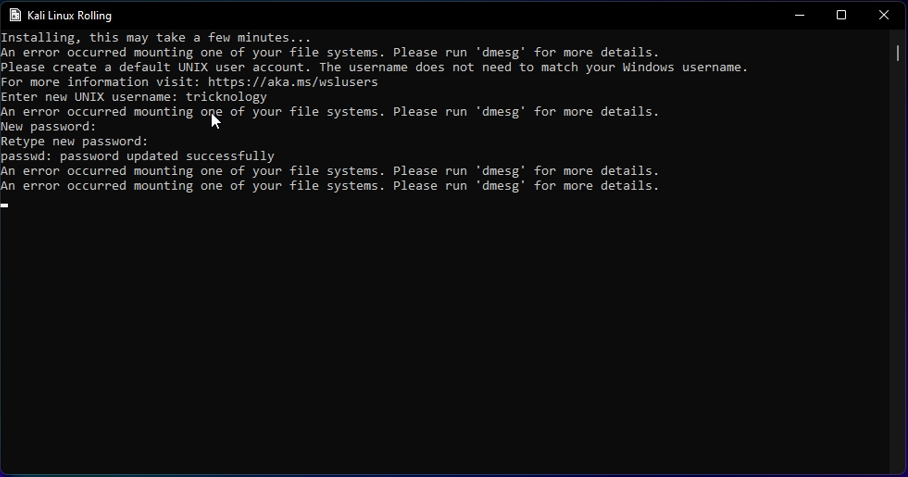
Set kali Linux username and password:
Download the Install XRDP
Now open Kali Linux Terminal and Type the below commands one by one
sudo apt update && sudo apt -y upgrade
sudo apt -y install kali-desktop-xfce
sudo apt-get install xrdp
sudo cp /etc/xrdp/xrdp.ini /etc/xrdp/xrdp.ini.bak
sudo sed -i 's/3389/3390/g' /etc/xrdp/xrdp.ini
sudo sed -i 's/max_bpp=32/#max_bpp=32\nmax_bpp=128/g' /etc/xrdp/xrdp.ini
sudo sed -i 's/xserverbpp=24/#xserverbpp=24\nxserverbpp=128/g' /etc/xrdp/xrdp.ini
sudo /etc/init.d/xrdp start
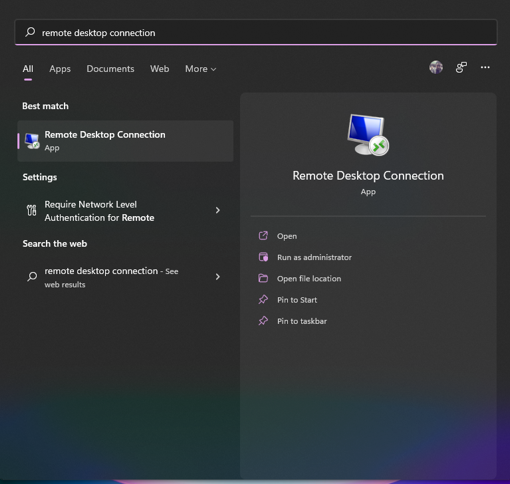
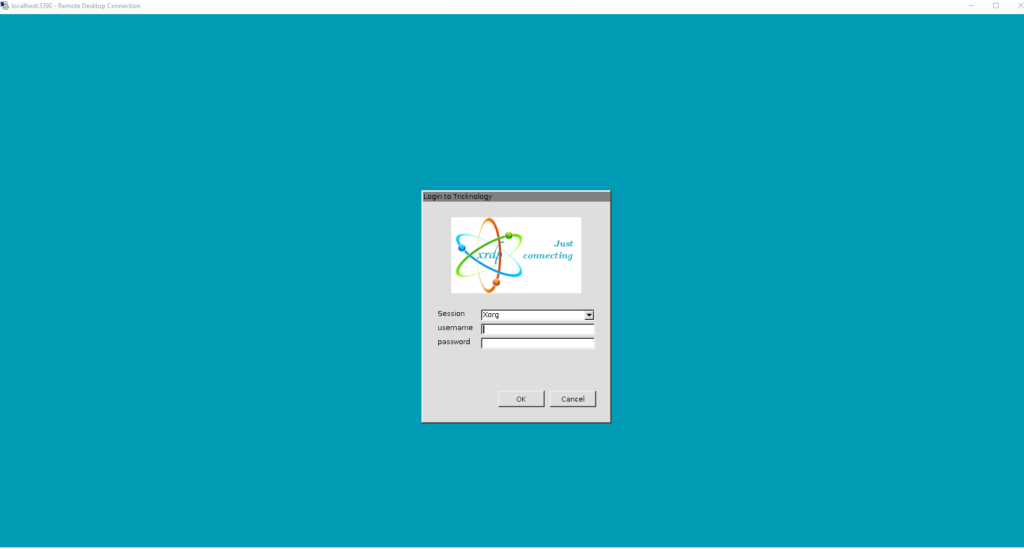
Now go to Windows 11 start menu and open the remote desktop connection app.
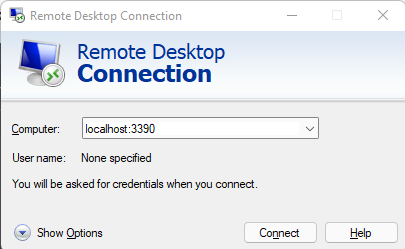
Type Localhost:3390
Type Kali Linux username and password
Thank you for reading this Article, It’ll encourage me to gather more knowledge and share with you . You can also watch my video on this article.


