
If your Windows 11 PC shows 100% disk usage, then it will really slow down your Windows 11 PC or Laptop.
To fix this you can follow this article.
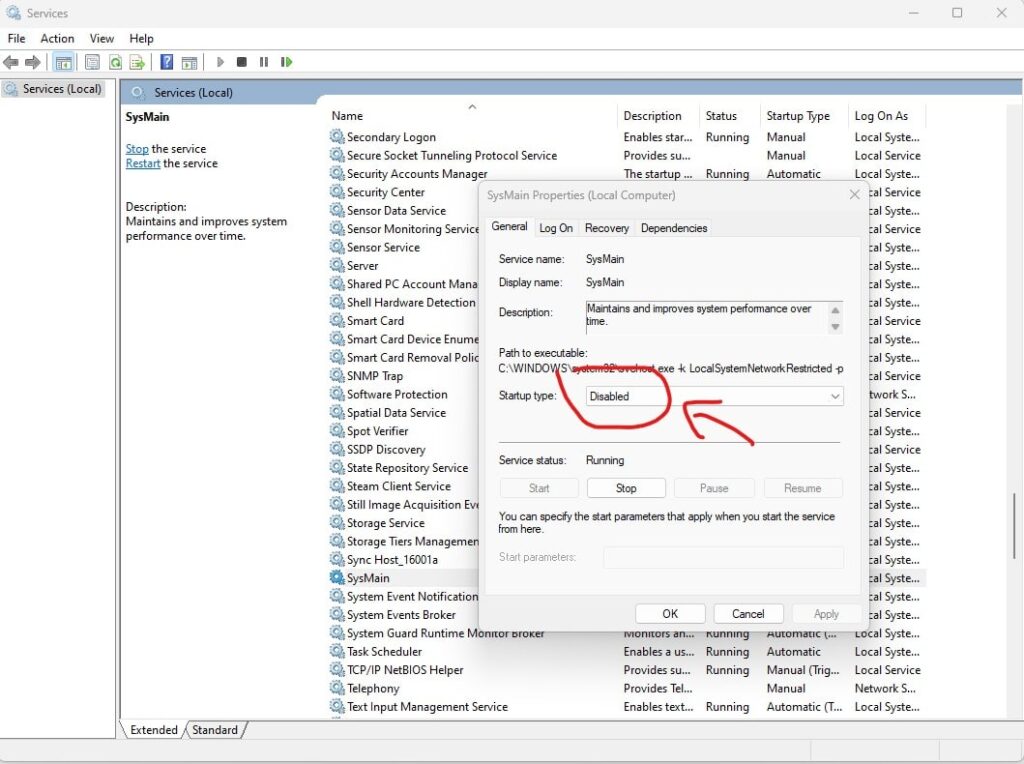
Disable SysMain(Superfetch) and Connected User Experiences and Telemetry:
Sysmain we are also known as super fetch in Windows 11 previous version. sometimes due to SysMain and Connected User Experiences and Telemetry causing high disk usage in Windows laptops or PC.
However, To disable SysMain and Connected User Experiences and Telemetry services follow the below steps.
- Go to the Search menu or Start Menu
- Type SERVICES.MSC and press Enter.
- Find and locate the SysMain and Connected User Experiences and Telemetry Servies.
- Right-click on the service and select Properties.
- Now select the Startup type drop-down under the General tab
- Select Disable
- Now you need to click on Apply and ok to save the changes.
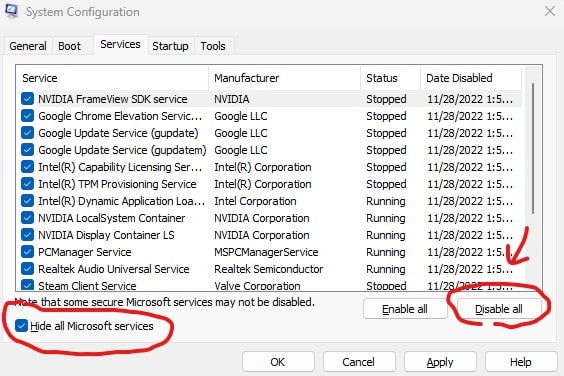
Disable All the Services which is Running in your background:
To disable all the services you need to follow the below steps.
- Go to the Search menu or Start Menu
- Types MSCONFIG and press Enter.
- Now click on Services Tab.
- Click Check to Hide all Microsoft services.
- Now select the Services and click on Disable all
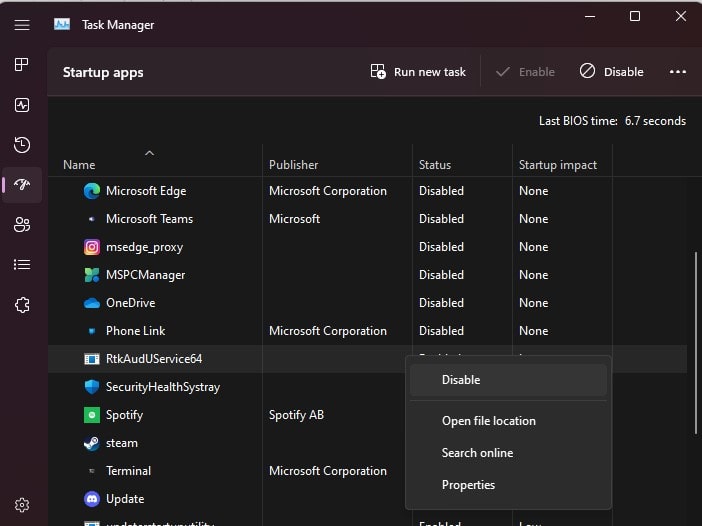
Disable Startup Apps:
Sometimes we all install a few software or apps on our computer and those services automatically start during the PC starts.
So you can easily disable those apps from startup using a few simple steps.
- Right-click on the Start button
- Click on Task Manager
- Click on Startup Apps
- Now Right-click on those apps which not required on your startup
- Click on Disable one by one
Assign Virtual Memory For your Windows 11 PC or Laptop:
You can easily fix your high disk usage problem with virtual memory. So you don’t need to install physical ram for this method. Using a few simple steps you can easily assign virtual memory on your pc.
- Go to the search menu or Start Menu
- Type SystemPropertiesAdvanced and click on Ok
- Click on Advanced.
- Click on Settings under the Performance Tab
- Click on Advanced.
- Click on Change.
- Uncheck Automatically Manage Paging file Size for All drives.
- Click on Custom Size
- For the initial size, you just need to enter the same value in the recommended size.
- For the maximum size, the value should be the size of your ram size multiplied by 1.5.
- once it will be done click on set and apply ok.
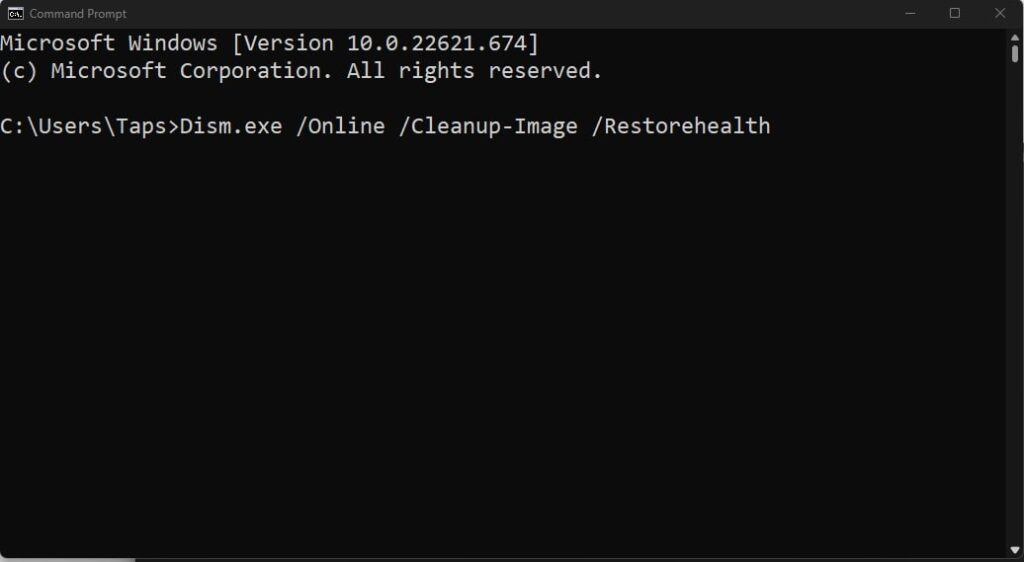
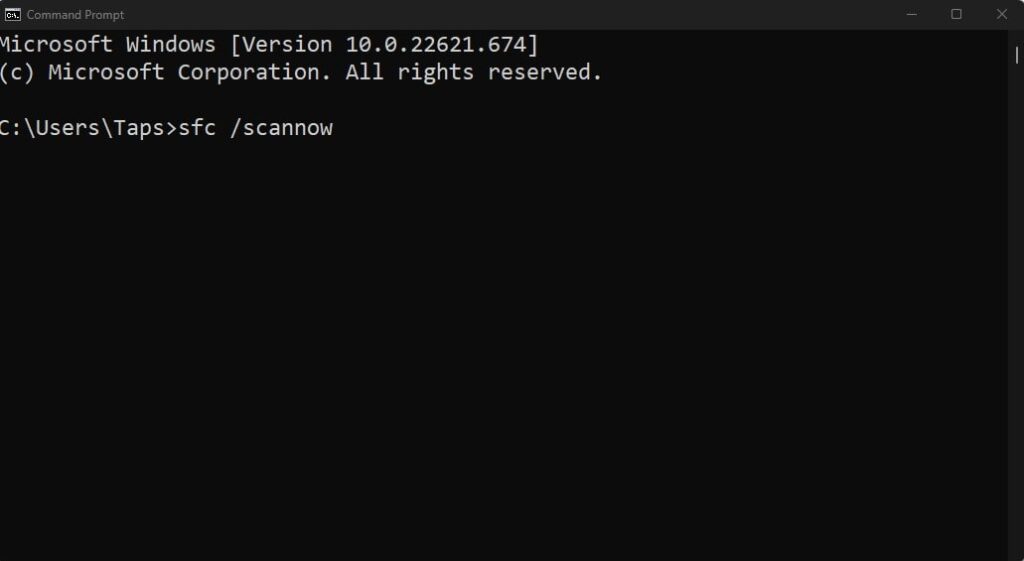
Fix with System File Checker and DISM tools:
- Go to the search menu or Start Menu
- Type CMD
- Right-click on CMD and Click on RUN AS ADMINISTRATOR.
- Now Type Below Command one by one
Dism.exe /Online /Cleanup-Image /RestorehealthSFC /SCANNOW
